Did you know you can use your acrylic blocks with a masking technique?
What if you only had ink, Watercolor Pencils, acrylic blocks, stamps, paper, and adhesive? Ok, so you would need a pair of Paper Snips and some full adhesive post-it-notes*, too! Now, you can make a fun masking technique background with just what I listed!
*I purchased these specific post it notes from Amazon, but we are getting Masking Paper in the New 2022-2023 Stampin’ Up!® Catalog!!?? I am a tiny bit excited, can you tell??
Cutting the Fur
Masking method starts with creating a mask slightly smaller than the original stamped image.
- First, stamp the Bunny full strength (first generation) on a post it note using Early Espresso ink. This will create our Mask for the Masking Technique.
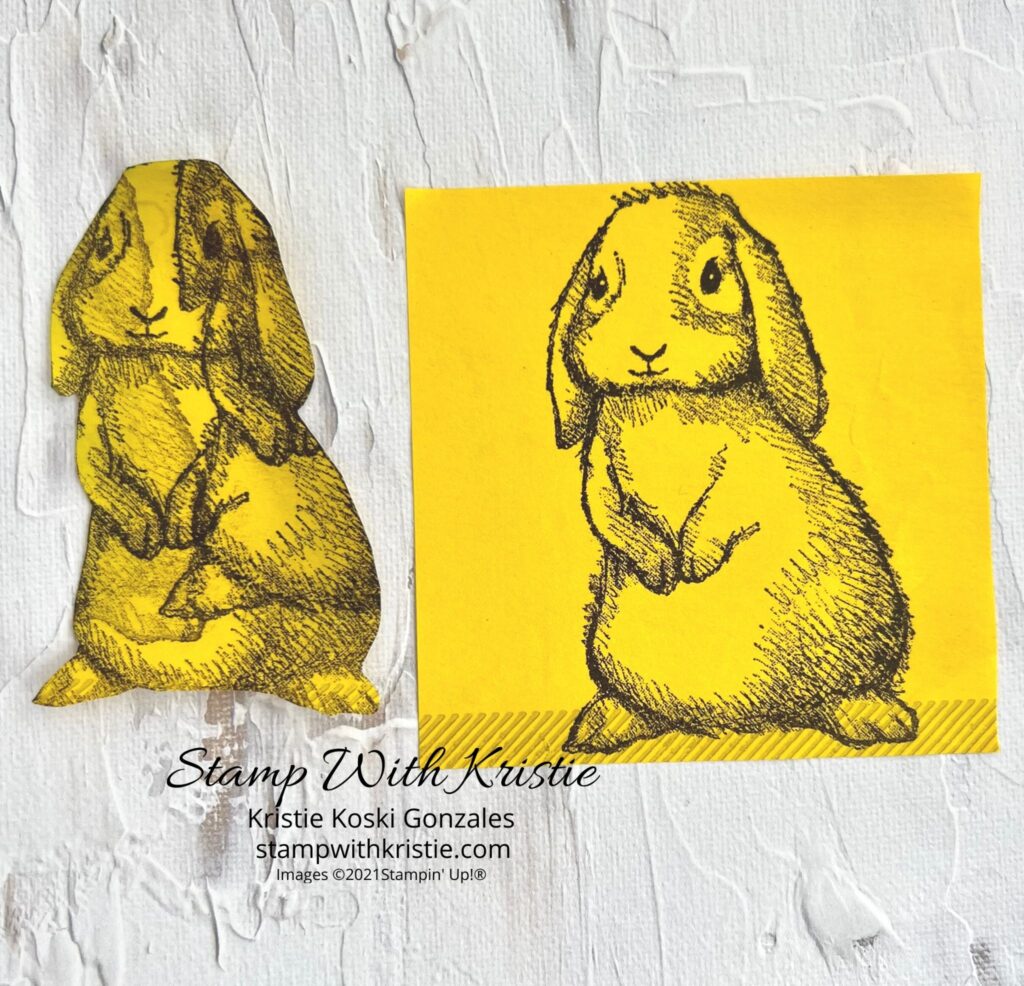
I used this cut one already for a different project so there is a whole bunch of other stamped bunnies all over him!
- Then, without cleaning it, stamp the bunny again (second
- generation) onto a 3-3/4” x 5” Basic White card front. Clean the stamp using the Simply Shammy.
- After the ink is dry on the post it note, cut out the bunny like you are cutting off his fur or giving him a “hare” cut. ? I know I know a hare is different from a bunny. ? So you don’t get a white halo effect around the bunny when you do the masking, cut off the outline of the bunny. (see above photo)
Masking Technique at Work
Here’s how to use your Acrylic Blocks to create the masking background.
- First, center the mask over the card front bunny image and then press to adhere.
- Next, ink your acrylic block with the brush end of the Balmy Blue Stampin’ Write Marker. Brush up along the curved edge, also. This will make it easier to get closer to the bunny.
- Then, put that curved part up against your masked bunny and flatten out the block. Slide it flat and in one sweeping motion, move the block toward the edge of the card.
- Keep coloring the block and inking up the background until you like the look. It is perfect to leave some white spaces for the eye to rest.
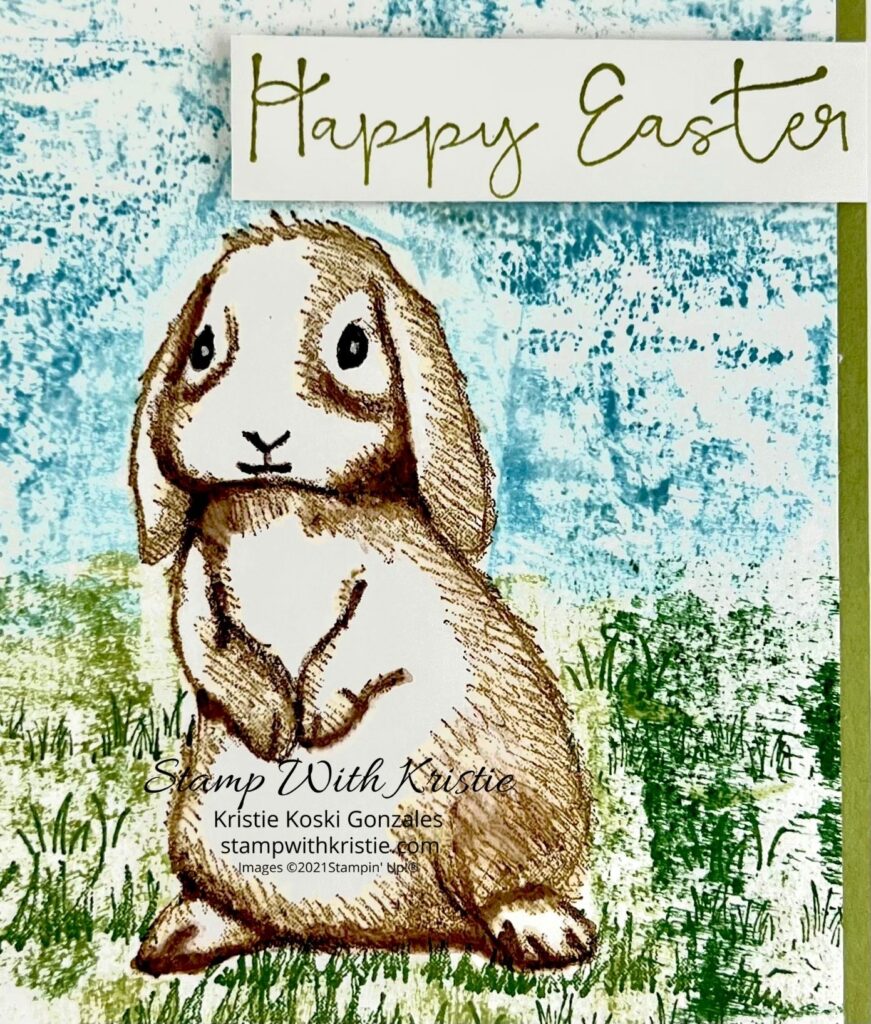
Finishing the Masked Ground
- Clean off the block with the Simply Shammy and move on to the Pear Pizzazz marker while using the same Masking Technique for the ground.
- Once done with the background, you can use the grass stamp to stamp sporadically around on the Pear Pizzazz bottom. I used Garden Green ink for the grass stamp.
Unmask the Bunny
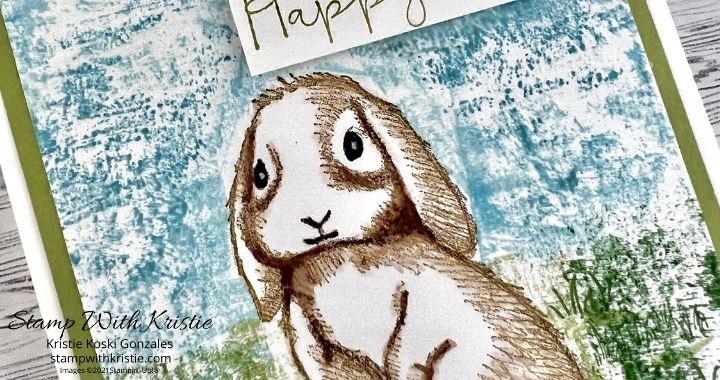
Once you remove the mask, then color the Bunny how you like. I used the Watercolor Pencils.
But What Color to Use?
I used the Early Espresso dipped in water*** and then used to shade the bunny and to add swipes of fur. Stampin’ Up!® already has fabulous shading with the stamped image, so I just add a little to it for more depth.
Also, I used the Basic Black dipped in water to darken his eyes. Being careful to keep the little white dot visible.
***Tip, I put a little bit of water on one of the clear acrylic blocks
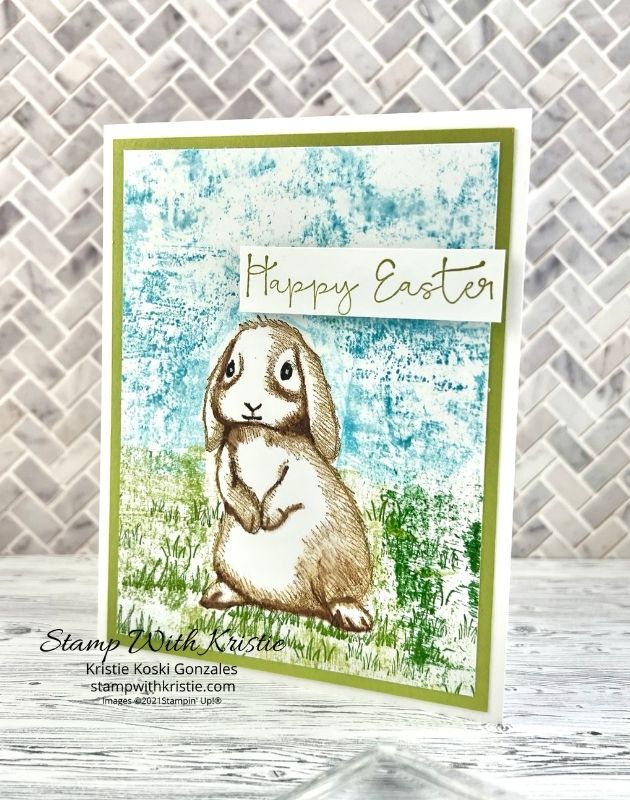
Putting it all Together
Using Stampin’ Seal+ or Multipurpose Liquid adhesive (known as the Green Bottle Glue or Tombo)
Adhere the Bunny Scene to the 4″ x 5-1/4″ Pear Pizzazz matte and that to the Basic White Card Base (5-1/2″ x 8-1/2″ scored in middle at 4-1/4″.) I used our Trimmer to cut all the cardstock pieces.
Stamp Sentiment with Pear Pizzazz on a strip of Basic White and adhere that with Stampin’ Dimensionals.
Lastly, stamp an inside sentiment on a piece of Basic White Cardstock with Pear Pizzazz ink. Feel free to stamp your envelope outside as well.
If you liked this tutorial and love the items I used, the links to all the products are below so feel free to do some shopping!
Current specials & offers:
- Shop with me and spend $50 or more (prior to shipping and taxes) and receive my monthly Tutorial bundle but remember to opt in on the Stampin’ Up! site to recieve offers from me so I can email that bundle to you. Click Here to shop with me.
- Learn more about joining The Fabulous Stamping Peeps Team or, join my team right quick! We would love to welcome you to our Fabulous group!
- If you need a Demonstrator and live in the USA, I would love to be yours! Please contact me if you need a catalog or with any questions you may have regarding crafting classes or Stampin’ Up! products.
I hope you have a fabulous stamping day!
Kristie
Product List")


Love it. Great job! Very informative ?
Thank you so much Char! I appreciate you taking a looksie! ?
Love this technique! Thanks for sharing the instructions. Sure is a cute bunny!